How to Create a GMT Clock
If you need to monitor GMT time zone in World Clock, the
configuration procedure is pretty much the same as for any other clock. The only difference is that for clock location you need to select either
GMT,
UTC, or
Zulu.
The procedure below describes how to add a Zulu clock using the
Add clock option in the right-click menu. If you only need GMT and local time in taskbar you may also want to check out these
templates.
Adding a GMT Clock from a Right-Click Menu
In this procedure, we start with 2 existing clocks in taskbar as on the picture below. Right-click on any existing clock and select the
Add clock option.

Use the Add clock option in the right-click menu
When you click on the
Add clock in menu, Preferences should open with
New Clock just inserted. Notice that it is currently set to
Local System Time zone.

New Clock in Preferences is set to Local System Time
Now change the location by clicking on the
Change button to the right of the
Location field with
Local System Time in it. The World Map should open. Find and select the
GMT line in the locations list to the right of the map and click the
Apply button on the bottom.
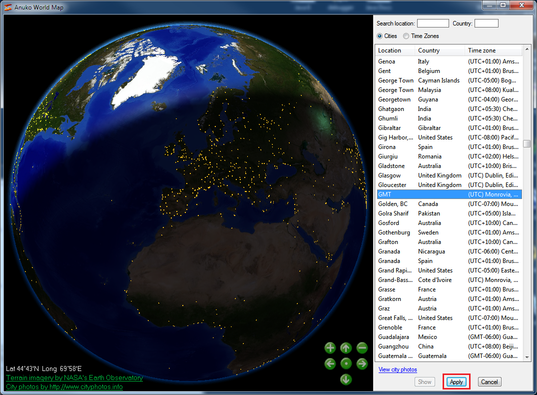
Selecting GMT on the World Map
Alternartively, you can select
UTC, or
Zulu lines. This will have the same effect, although clock labels will be different. After clicking
Apply on the World Map notice how Preferences adjusts settings for new clock.

GMT clock in Preferences, after changing location to GMT
The last step is to click the
OK or the
Apply button in Preferences. Below is a screenshot of how this GMT clock looks in taskbar, along with two other clocks that were there before.

GMT clock in taskbar
